


Here we look at not one but three devices from the South Korean manufacturer IDIS: an eight channel NVR and two cameras. These devices are all from IDIS’s PSI Premier Award 2014 winning DirectIP™ “Plug’n’Play” range.
First up is the DR-6108P NVR. This is the smallest unit in the 6100 series line-up, with a capacity for up to eight cameras (the DR-6116P and DR-6132P can accommodate up to 16 and 32 cameras respectively).
The 6100 series is the highest spec in the range, with storage capacity up to a substantial 66TB (18TB internally across six SATA disks and the remainder external via up to four eSATA connections) and the most impressive frame rates across all channels, with 30ips per channel on the eight and 16 channel units and 15ips on the 32 channel unit.
On paper at least there is little to tell between DP6100 and the DP4100, the next level down in the range – 66TB storage total gives way to 32TB and frame rate is reduced to 15ips/channel and 10ips/channel for the 16 and 32 channel units respectively. The DP-4100 also drops an RS485 port, which on the DP-6100 can be used for connection to devices such as POS terminals (RS232 and USB connections are still available, the same as the DP6100 for the same purposes)
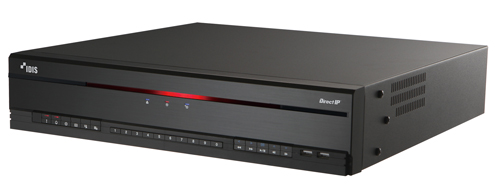 DR6108P – out of the box
In the box is the NVR itself together with most items you will need to get it up and running: power lead, paper copy of the Quick Start guide, CD containing product manual and IDIS Centre software (more on that later), USB optical mouse, rack mounting ears, plus SATA cables and screws to mount up to five further disks internally and a remote control unit.
The front panel of the unit is clean and uncomplicated, with simple but clear LED indicators for network connection and activity, internal and external disc connectivity and activity and alert status. Two USB connections are provided, typically one for mouse connection and the other for an export device such as USB disk or stick. Buttons on the front panel are well spaced for even the largest of fingers and give good tactile feedback when pressed. However the mouse gives all of the control options of the front panel and it is assumed that this or the free IDIS Centre PC software would be used in most environments. Personally I am a little lost on the remote control option – my experience is very few people use these, however the it is there if required and provides all necessary features also offered by the front panel and mouse.
On the back of the unit we find a total of ten RJ45 network connections. Eight of these are Power over Ethernet (PoE) ports for the direct connection (and powering) of cameras, or alternatively the IDIS DirectIP™ hubs if you need to extend range or use a different network topology. The remaining RJ45 connections are for external video connections (including third party devices by Axis or ONVIF Profile-S compliant units) whilst the last port if for remote connectivity via PCs and / or mobile devices.
The rear panel also sports four eSATA connections for expanding storage, VGA and HDMI outputs to a local monitor, audio in and out on RCA connections, alarm inputs, contact outputs and serial connections to allow text based triggering from third party devices such as POS systems or ATMs.
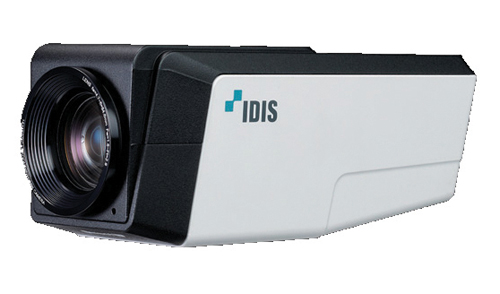
DC-T and DC-Z series cameras
The two cameras we have been provided come from the external bullet range (DC-T) and internal ‘box’ with zoom range (DC-Z). The specific devices are:
DC-T1233WHR – a 1920×1080 full HD camera with motorised 3-9mm vari-focal lens. Being a bullet camera the unit has an array of LEDs surrounding the lens, which are rated up to 30m and uses a true infra-red cut filter for periods when the LEDs are active and the unit is in monochrome mode. Audio In and Out to external line level microphone / speaker is provided via RCA connections on a flying lead, as are network connection, local video output and power if not using PoE.
DC-Z1263 – again a full HD 1920×1080 device, this time with an 18x (4.7-84.6mm) zoom lens. This unit has a built in microphone as well as connectivity for external line level microphone-in and speaker-out via push connector blocks on the rear. This camera also provides connectivity for an alarm input (e.g. PIR or door contact), a relay output, an RS485 connection and an SD slot for edge / off line recording.
Cameras – out of the box
 The contents of the two boxes differ slightly, mostly depending on the characteristics of the individual camera, but with some surprising
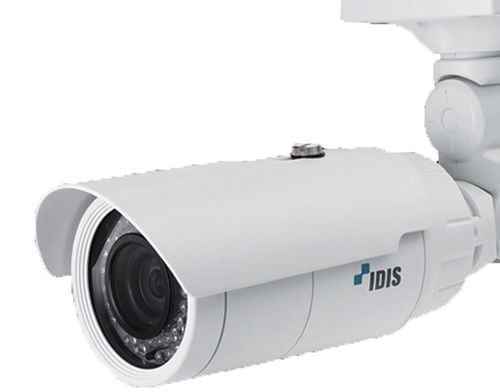 differences / inconsistencies. Both contain a paper copy of the Quick Setup guide and the Open Source licensing agreements.
The DC-T1233WHR also comes with mounting bracket and mounting screws, sun-shield and attachment screw, Allen key for adjusting the bracket, CD containing full instruction manual and 12Vdc power supply.
By contrast, the DC-Z1263 only provides a ferrite core, which interestingly the Quick Guide makes no comment on regarding where it should be used or the importance of it. Notable by their absences within the DC-Z unit box are the CD containing the instruction manual (which can be downloaded) and any form of power supply, which one would assume would be common inclusions across the range. Another useful addition would be an RCA to BNC adaptor, as the local video output on the back of the device is provided by an RCA jack (the local video output on the DC-Z device under test is on a female BNC via a flying lead).
Save for the external connections previously described, there are no user configurable options on the units. All setup is performed remotely, typically via the NVR interface if using DirectIP or alternatively via web page if not.
Initial setup and first impressions
Having assembled a couple of network leads and a monitor we were ready to go. Cameras connect directly into PoE ports on the back of the NVR and are brought to life when the DVR is started, so nothing more to do there for the moment.
Initial start-up of the NVR takes about 90 seconds from applying power and the first time the system is started (or following a factory restore) we are presented with two ‘wizards’ in succession, the first sets date, time, locale, and recording preferences. The second takes us through network configuration for connecting to the outside world.
Once these wizards are completed (which takes all of about 30 seconds) we are presented with the ‘Camera Registration’, where the system shows information regarding the cameras it has found using its own DirectIP connectivity and from where we can also add any third party devices. Our two camera devices were found instantly, including correctly identifying the respective models and applying default names of CAM1 and CAM2. So with nothing more to do we hit the ‘apply’ button. And there we have it, a fully (albeit basically) configured CCTV system. Everything else from here on in with regards to the setup really is ‘tweaking’ and when you dig below the surface there is a lot you can tweak! This really is a very comprehensive system indeed!
In well under five minutes of having first connected power to the NVR, we have a fully operational system. OK, so we only had two cameras, but I see no outward reason why a 16-camera system should take much longer to get to the same point. For good practice we would want to spend another couple of minutes applying admin passwords, configuring some individual users / rights and possibly renaming cameras to something a little more descriptive, but then that really is it.
One down side I would mention at this stage is the fan noise from the NVR. The unit is fitted with a single fan at the back of the unit and it is fair to say it is not particularly quiet. Although not so loud that voices have to be raised to be heard over the top of it, it is far louder than (for example) a conventional PC fan and enough that you suddenly realise how quiet it is when the unit is switch off.
Once the initial setup has been completed there is a host of options we can further embellish, add on or cut out. For the price point the system is amazingly well featured.
System operation
Although fairly intuitive, the buttons on the front of the unit are not the easiest to use, requiring continuous looking away from the screen to ensure you are pressing the correct button. The remote control is quite nice to use; intuitive, responsive and with an amazing working range and angle, however still requires a lot of looking backwards and forwards between screen and controller to ensure you are using the correct buttons.
For the majority of my testing I used the mouse option, directly plugged into one of the USB ports on the front of the unit. The mouse uses the same on screen interface as the other two methods, but is obviously ‘point and shoot’ whilst keeping eyes on the screen, as opposed to navigating through options using up, down, left, right and select options of the front panel or remote (although the remote control does have numerous shortcut buttons).
System control is very simple and mostly icon driven. On the whole the icons are fairly self explanatory and, if you are not entirely sure, a brief description pops up when the mouse is hovered over an icon. Some element of on-board help would be beneficial in certain areas, but most users should be able to select and control live cameras, find recordings by time or event and export clips with well under an hour of training.
Live viewing mode provides most of the normal features you would expect of a CCTV system: various multi-screen layouts as well as full screen display of single cameras, PTZ Control, digital zoom, sequence. The On Screed Display (OSD) also shows camera name together with various icons to show elements such as recording and PTZ control status.
Searches for recorded information are split into two main areas: time-lapse search (search by date / time) and event log search (search by alarm events as well as system notifications).
Event log searches are clearly laid out and very quick to use. Searches can be performed on a number of criteria including time/date ranges, specific alarms (motion, contact inputs, video loss, etc) and system events (e.g. disc errors, fan errors, eSATA disconnections etc). The resulting event search provides a chronological list of the events matching the criteria and highlighting these events gives a preview of the associated video. A second click on the highlighted event takes us to the time lapse screen, where we can review our video properly using normal playback controls and subsequently export footage.
Bookmarks can be set against recordings and a brief description applied for quick retrieval later on. Only 12 such bookmarks can be set, so on busier systems these may need to be used sparingly, but is still a handy feature.
Exporting video is a simple enough process. Options for exporting include date/time range, cameras to be included in the export, a password option to play the resulting clips on a PC, output destination (if more than one storage device is available) and set the resulting file name.
Like any HD or megapixel system, the data generated, stored and subsequently exported will be far greater than more conventional systems running at lower resolutions, so be ready for some quite long waits whilst exporting.
Camera performance
Both cameras under test performed well across the board. Resolutions were pretty much spot on and colour rendition was good. In darkness the bullet camera with self contained IR did well. However under darkness / IR conditions, the box camera did appear to be regularly going into monochrome mode and then trying to go back into colour mode, which disrupted the video quite a bit. However for the periods it was operating in low light / IR mode its performance seemed to equal the bullet device.
The auto focus on the box camera did seem a little over eager at times, especially with larger objects moving in the foreground, often readjusting the focus briefly but frequently enough to be noticeable.
Audio throughput from the box camera also seemed to lag the video by around half a second in live operation, but this seemed nearer in sync on playback. The audio pickup and quality was quite reasonable for a small integrated microphone and the option always remains to hook in a higher grade external mic to the back of the unit if required (as it does with the bullet device also).
One of the things that most impressed me with these cameras is how cool they ran. So many cameras today run so hot that it cannot be good for them in the long term. However both of the IDIS devices were barely warm to the touch.
In summary
All of the products are well thought out, well built and perform well. The DirectIP operation does precisely what plug’n’play should, in that it enables a system to be up and running very quickly, but then allows you to delve deeper to fine tune if needed. The cameras feel solid and deliver what they promise on the well constructed, well labelled box, as does the NVR. The NVR itself is uncomplicated and well laid out front and rear and additional storage can be added quickly and easily on site with minimal fuss or disruption.
The system is surprisingly feature-rich, especially considering the price point. No, the system doesn’t have some of the bells and whistles, such as advanced analytics, or the integration into third party access control or detection systems offered by others. But what it does give is a good CCTV recording and control system, and then a bit more, so is suitable for many environments.
Score: 9/10